Thursday, February 19, 2009


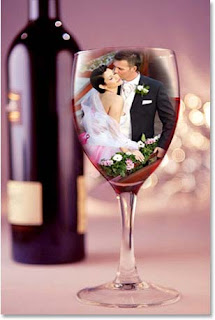
In this Adobe Photoshop tutorial, we're going to look at a classic Photoshop effect for wedding photography, placing the wedding couple inside a wine glass. This is a very easy Photoshop effect to create, requiring nothing more than a few basic tools, a layer mask, and a few minutes worth of effort. We'll be finishing off the effect with a slightly more advanced blending option, but "more advanced" definitely doesn't mean "more difficult", as we'll see.
If you're not into wedding photography, you can use this Photoshop technique to place images inside any glass object, like a bottle or even an hour glass, and it also works great for placing images inside bubbles which is always a fun thing to do.
Any recent version of Photoshop will work just fine.
Here's the two images I'll be using in this Photoshop effects tutorial:
In this Photoshop text effects tutorial, we're going to learn how to create a fire text effect, engulfing our letters in burning hot flames. We'll be using Photoshop's powerful Liquify filter for most of the work on the flames themselves, but we'll also be taking a look at the Wind filter, using adjustment layers to colorize the flames, layer styles for adding color to our text, layer masks for blending the flames with the letters, and more!
Here's the result we'll be working towards:

In this Photoshop tutorial, we're going to learn how to create an interesting photo effect by taking an image and turning it into a series of interweaving strips. We'll be using a few layers and layer masks in the tutorial, as well as a couple of clipping masks and a layer style, and we'll be turning on Photoshop's grid to help us out.
The first time I saw this Photoshop effect, I thought "Wow, there's some really advanced stuff going on there!". But as with most things in life, after thinking about it for a few minutes, I realized just how simple it really is, as we'll see!
Here's the photo I'll be using for this tutorial. It's the same image I used in the
Ghosting An Image tutorial but it works great with this effect as well:

Tuesday, February 17, 2009


IN MYSELF THE BEAUTY IS GREAT GIVE OF GOD?

Sunday, February 15, 2009


In this Photoshop photo effects tutorial, we're going to learn how to easily add a realistic water reflection to any photo. It's a very easy effect to create and you can add it to any photo you like, although it tends to work best with images that don't already contain water in them.
We'll be using a simple filter and a displacement map to create the water ripple effect, and a Hue/Saturation adjustment layer to give our water a little color.
Here's the photo that I'll be working with throughout this tutorial:

In this Adobe Photoshop tutorial, we're going to see how to engulf text in an explosion of light and color.
There's quite a few steps involved in this text effect, and we'll be using a couple of filters that are not used very often in everyday Photoshop work, but creating the text effect is quite simple and the end result is definitely worth the effort.
Here's the text effect we're going for: